Johnson Service Bulletin SB-1177 - Servicing 3 & 4 H.P. Starters
Issued December 1968, this factory bulletin explains corrections for starter-rope fraying and recoil spring failures on Johnson 3 and 4 H.P. outboards. Seven original factory photographs illustrate the servicing procedures.
SUBJECT: SERVICING 3 & 4 H.P. STARTERS
ON MODELS: JW, JH-23, 3 H.P.
4R, 4W-69, 4 H.P.
Complaints of rope fraying and starter spring failure have prompted an investigation into these problem areas and resulted in the following servicing procedures.
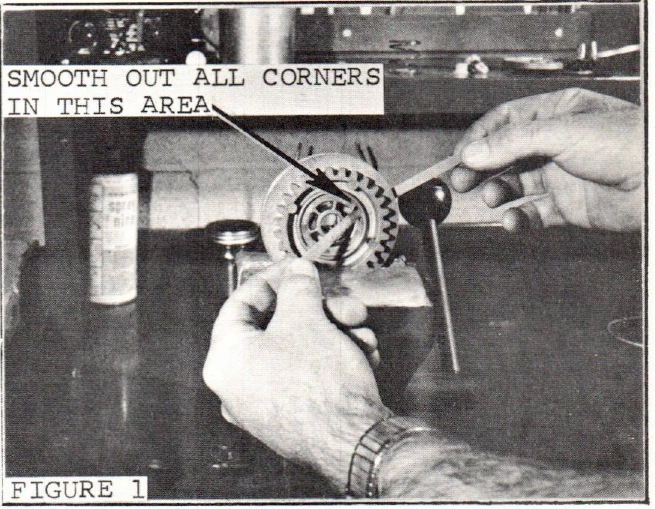
Fraying of the starter rope is caused by a sharp edge on the starter pulley. Figure 1 illustrates the use of 1/4" wide piece of sandpaper or emery cloth to clean up these sharp edges. Smooth as much of the area as possible. Additional length has also been added to the starter rope to lessen the possibility of the rope being pulled out to its maximum. For service, use Rope #3115472 which is 64" long (8" longer than the #3113153 Rope listed in the parts catalog). Failure of the starter spring has been attributed to improper preload and improper engagement of the spring end-loop with the pulley.
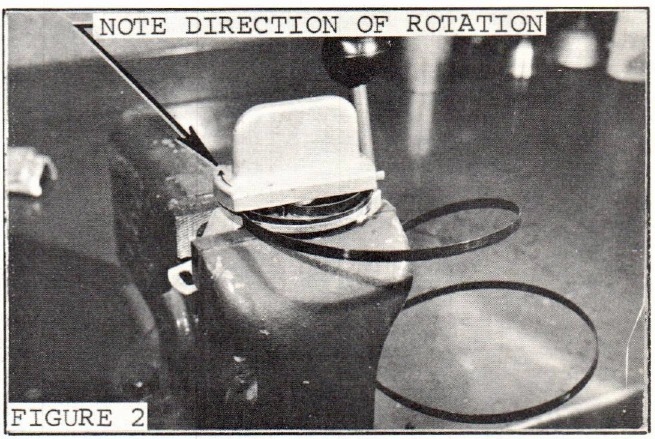
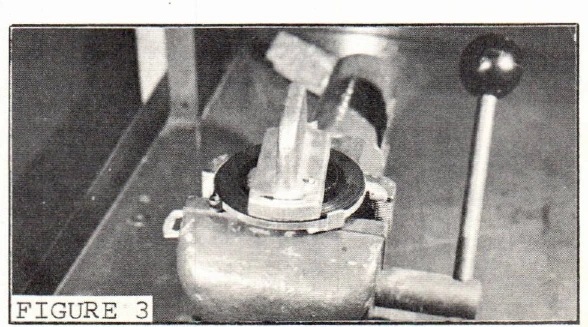
Figures 2 and 3 illustrate the spring being wound into the spring cup utilizing Bob Kerr's #101 Spring Winder. This is also available under OMC Special Tool #383967. Note in Figures 2 and 3 the clockwise rotation and the engagement of the spring end with the winder.
JOHNSON MOTORS, DIVISION OF OUTBOARD MARINE CORPORATION, WAUKEGAN, ILLINOIS 60085
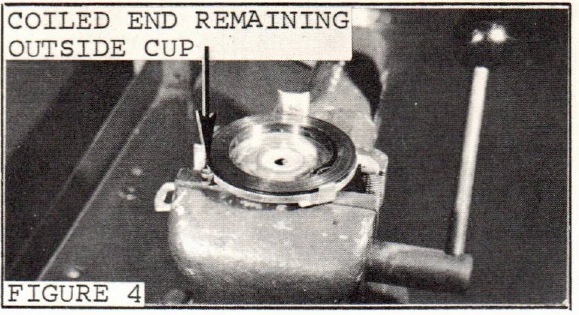
Figure 4 illustrates the spring wound in the spring cup. Note the coiled end remaining outside the cup. This end may end up reversed from the illustration and makes no difference. The important thing here is the loop-end which engages with the pulley. It must be as illustrated.
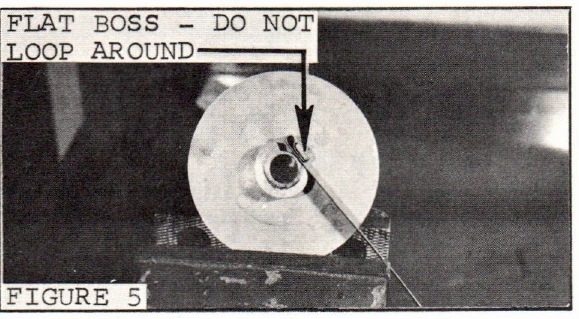
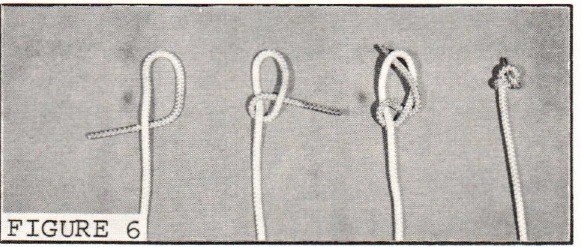
Figure 5 illustrates the engagement of the spring with the pulley. Do not install loop around the flat boss. The loop end must be installed as shown. Prior to assembling the starter, secure the rope to the pulley using the knot illustrated in Figure 6.
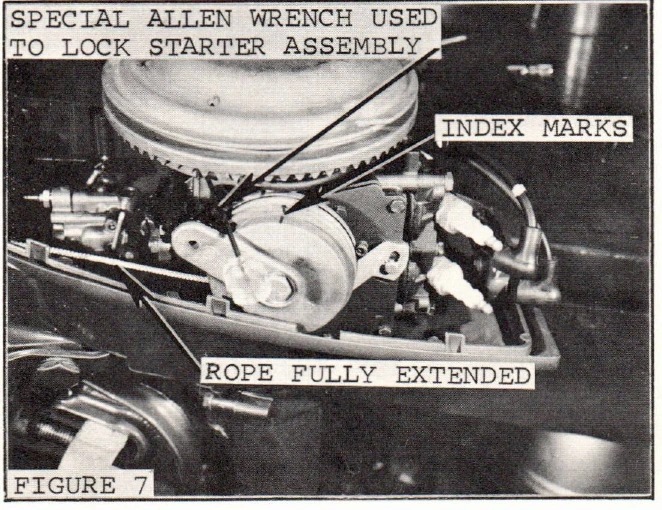
To preload the spring, install the assembled starter to the engine and rotate the rope pulley clockwise, as viewed in Figure 7, until the spring is tight. Index the pulley and then turn counterclockwise one revolution. Lock the assembly with an appropriate device such as the long Allen wrench shown. At this point, completely uncoil the rope and attach the handle using the knot illustrated in Figure 6. It is important that the spring preload be tight, minus one turn when the rope is fully extended.
Carl Klawonn
Administrative Assistant
CK:rm
NOTE: Post on your 3 and 4 horsepower Index under the heading "Miscellaneous."