SB-1449 - 1977 50 HP Manual Start Engines
Issued January 1978, this Johnson Service Bulletin describes starter and ignition improvements and starting procedures for 1977 50 HP manual-start outboards.
Several improvements can be made to the 1977 50 HP manual start engine to increase starter durability and to ease engine start-up:
A) A new starter bushing, P/N 323926, which must be used in conjunction with the instrument cable clamp, P/N 318286, can replace the eyelet in lower motor cover assembly, P/N 387075. This change reduces starting effort and premature fraying of the starter rope where it passes through the lower motor cover.
B) A new solid stainless steel pin, P/N 307949, replaces roll pin, P/N 317518, that passes through the pinion, to reduce wear. After removing the roll pin and cleaning out the hole, the solid pin should be secured in place with OMC Ultra Lock, P/N 388517.
C) Install a new starter rope 70 inches long from rope spool, P/N 316705, to replace the worn out rope as follows:
1) After removing the old rope, turn the starter spindle counterclockwise, as viewed from the top, until the spring is fully wound.
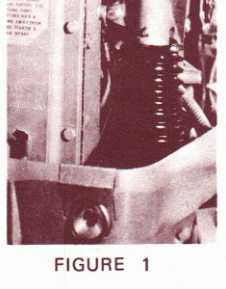
2) Back off the spindle clockwise from this position until the rope anchor point on the spindle faces forward towards the starter bushing in the lower pan. See Figure 1.
NOTE:
The spindle must be backed off from the fully wound position to prevent spring damage; however, this should not require more than one full turn.
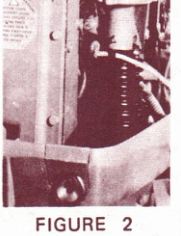
3) Insert the rope through the rope anchor and make a knot as shown in Figure 2. Pull the rope tight to seat the knot and slowly allow the spindle to wind up the rope. Extend the free end of the rope through the starter bushing in the lower pan and install the starter handle.
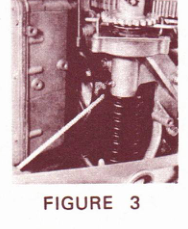
4) As a final check against excessive spring tension, pull the starter rope out hard, to the end of its travel, and hold it there. Use a small pointed tool to pull out the looped end of the starter spring. See Figure 3. The spring end must be free to extend a minimum of one-half inch (12.7 mm) from the cup. If this cannot be done, the starter spindle must be backed off one full turn and the rope reconnected as indicated above.
D) Mounting ring - shorting switch, P/N 324041, installed between the stop switch and the lower motor cover will reduce cases of the rubber cover being accidentally dislodged. In addition, use new shorting switch, P/N 389817, which has improved sealing around the lead wires. These parts will increase resistance of switch to being shorted out by moisture.
E) The bare ends of the lead wires on the back side of the sensor, the sensor hold down and attachment screw heads, and the space between the sensor and sensor support ring, should all be heavily coated with liquid neoprene, P/N 909570, to prevent moisture from causing a short in the sensor circuit.
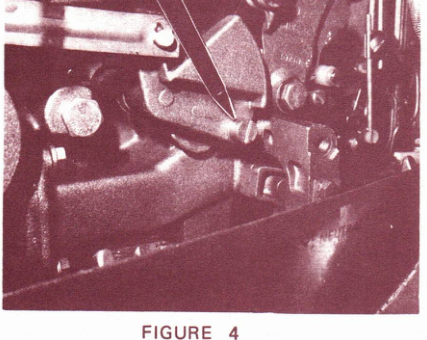
F) Remove and discard the screw normally used to limit throttle opening in neutral. See Figure 4. This allows the throttle to be opened further to aid starting a flooded engine.
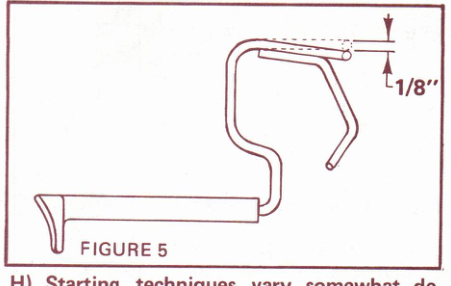
G) Proper synchronization of the choke linkage is very important for good starting. Both choke plates must be fully closed when the choke knob is pulled out all the way. Choke knob and extension assembly, P/N 385312, can be modified to reduce any tendency for the choke knob to stick before it has reached full travel. This is done by bending the upper arm of the extension assembly down, in the direction of the lower motor cover, approximately one-eighth inch as shown in Figure 5.
H) Starting techniques vary somewhat depending on engine temperature:
1) A completely cold engine -
a) Fully close the choke.
b) Advance throttle to the maximum position obtainable in neutral.
c) Pull starter until the engine fires, usually no more than three pulls.
d) Open the choke and the engine usually starts within one or two pulls.
NOTE:
Exceeding three pulls with the choke closed usually results in a flooded engine and greatly increases the number of pulls required for starting after the choke is finally opened.
2) A fully hot engine - within one-half hour of shutdown -
a) Do not close the choke or flooding may result.
b) Advance engine to the maximum position obtainable in neutral.
c) Engine usually starts in two pulls.
3) A warm engine - from one-half to one and one-half hours after shutdown depending on weather conditions -
a) Do not close the choke.
b) Advance engine to the maximum position obtainable in neutral.
c) If the engine does not start within four pulls, proceed with the cold engine starting technique.
D. J. Leinonen
Technical Data Coordinator
Related factory publications
Factory service information for Johnson 50 HP manual-start outboards.